🎀✨🧶💛
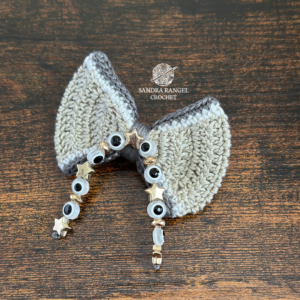
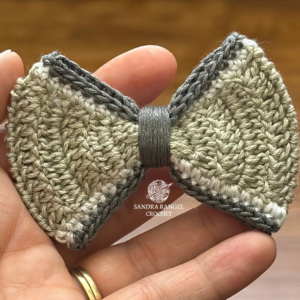
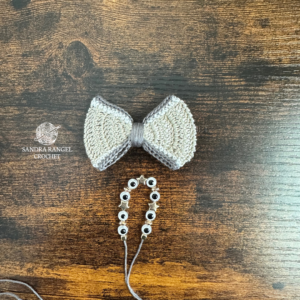
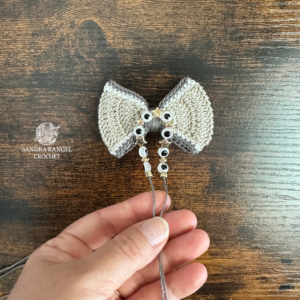
Light-Colored Crochet Bow
This light-colored bow is a simple yet elegant project that can be customized with your choice of colors and sizes. It was carefully crafted, and here I share the step-by-step instructions so you can create it too. If you love crochet and enjoy making personalized accessories, this tutorial is perfect for you. Keep reading to learn how to make it.
- Embroidery thread or the thread of your choice.
- Crochet hook #2.0mm or the hook recommended for your yarn.
- Yarn needle to weave in ends.
- Scissors.
- 6 cm hair clip (I used this size because the bow is small and the person for whom I made the bow has thin hair, but you can use the size of clip that matches your bow).
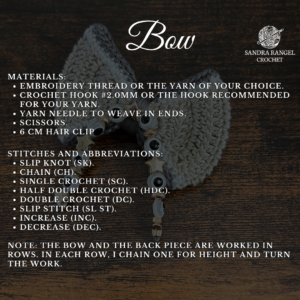
- Slip Knot (sk).
- Chain (ch).
- Single Crochet (sc).
- Half Double Crochet (hdc).
- Double Crochet (dc).
- Slip Stitch (sl st).
- Increase (2 dc in the same stitch) (inc).
- Decrease (dec).
Note: The bow and the back piece are worked in rows. In each row, I chain one for height and turn the work.
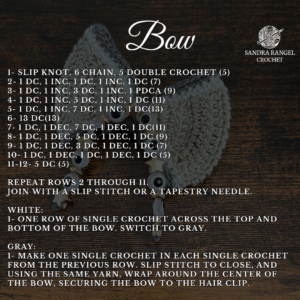
- sk, 6 ch, 5 dc (5).
- 1 dc, 1 inc, 1 dc, 1 inc, 1 dc (7).
- 1 dc, 1 inc, 3 dc, 1 inc, 1 dc (9).
- 1 dc, 1 inc, 5 dc, 1 inc, 1 dc (11).
- 1 dc, 1 inc, 7 dc, 1 inc, 1 dc (13).
- 13 dc (13).
- 1 dc, 1 dec, 7 dc, 1 dec, 1 dc (11).
- 1 dc, 1 dec, 5 dc, 1 dec, 1 dc (9).
- 1 dc, 1 dec, 3 dc, 1 dec, 1 dc (7).
- 1 dc, 1 dec, 1 dc, 1 dec, 1 dc (5).
- 5 dc (5).
- 5 dc (5).
Repeat rows 2 to 11 and join with a slip stitch or yarn needle.
Decorative details:
- With white thread, make a round of single crochet along the top edge of the bow. Switch to grey thread.
- Crochet one single crochet in each stitch from the previous round and close with a slip stitch.
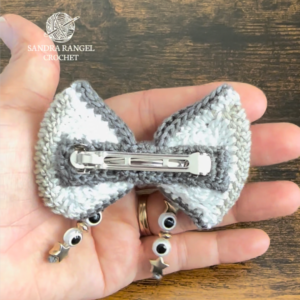
Repeat these two steps for the lower edge of the bow. Then, wrap the grey thread around the center of the bow, securing the hair clip as you go. Secure and hide the ends.
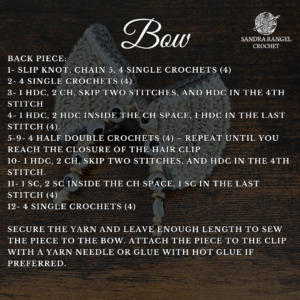
- sk, 5 ch, 4 sc (4).
- 4 sc (4).
- 1 hdc, 2 ch, skip two stitches, and hdc in the 4th stitch.
- 1 hdc, 2 hdc inside the ch space, 1 hdc in the last stitch (4).
- 4 hdc (Repeat this row until you reach the hair clip closure, approximately until row 9).
- 1 hdc, 2 ch, skip two stitches, and hdc in the 4th stitch.
- 1 sc, 2 sc inside the ch space, 1 sc in the last stitch (4).
- 4 sc (4).
Secure the yarn and leave enough length to sew the piece to the bow. Attach the piece to the clip with a yarn needle or glue with hot glue if preferred.
If you follow this tutorial, be sure to tag us on social media! We’d love to see your creations and share them with our crochet community. Happy crocheting! 🧶✨
Lazo de Colores Claros en Crochet
Este lazo de colores claros es un proyecto sencillo pero muy elegante que puede ser adaptado con los colores y tamaños que prefieras. Fue creado con mucho cuidado, y aquí te comparto el paso a paso para que puedas hacerlo tú también. Si eres amante del crochet y disfrutas creando accesorios personalizados, este tutorial es perfecto para ti. Sigue leyendo para descubrir cómo hacerlo.
- Hilo para bordar o el hilo de tu preferencia.
- Aguja de crochet # 2.0mm o la aguja recomendada por el fabricante de tu hilo.
- Aguja lanera para esconder las hebras.
- Tijeras.
- Hebilla para el pelo de 6 cm (Usé esta medida porque el lazo es pequeño y la persona para la que hice el lazo tiene poco pelo, pero puedes usar la hebilla que desees y que esté acorde con el tamaño de tu lazo).
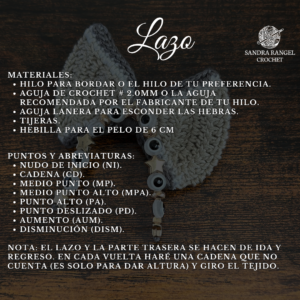
- Nudo de Inicio (ni).
- Cadena (cd).
- Medio Punto (mp).
- Medio Punto Alto (mpa).
- Punto Alto (pa).
- Punto Deslizado (pd).
- Aumento (2 pa en el mismo punto) (aum).
- Disminución (dism).
Nota: El lazo y la parte trasera se hacen de ida y regreso. En cada vuelta haré una cadena que no cuenta (es solo para dar altura) y giro el tejido.
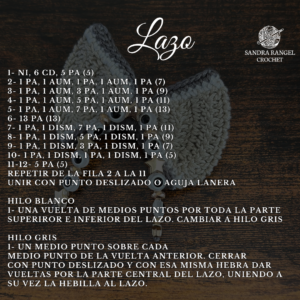
- ni, 6 cd, 5 pa (5).
- 1 pa, 1 aum, 1 pa, 1 aum, 1 pa (7).
- 1 pa, 1 aum, 3 pa, 1 aum, 1 pa (9).
- 1 pa, 1 aum, 5 pa, 1 aum, 1 pa (11).
- 1 pa, 1 aum, 7 pa, 1 aum, 1 pa (13).
- 13 pa (13).
- 1 pa, 1 dism, 7 pa, 1 dism, 1 pa (11).
- 1 pa, 1 dism, 5 pa, 1 dism, 1 pa (9).
- 1 pa, 1 dism, 3 pa, 1 dism, 1 pa (7).
- 1 pa, 1 dism, 1 pa, 1 dism, 1 pa (5).
- 5 pa (5).
- 5 pa (5).
Repetir de la fila 2 a la 11 y unir con punto deslizado o aguja lanera.
Detalles decorativos:
- Con hilo blanco, haz una vuelta de medios puntos por todo el borde superior del lazo. Cambia a hilo gris.
- Teje un medio punto sobre cada medio punto de la vuelta anterior y cierra con punto deslizado.
Repite estos dos pasos en la parte inferior del lazo. Luego, con la hebra de hilo gris, da vueltas por la parte central del lazo, uniendo a su vez la hebilla. Asegura las hebras y escóndelas.
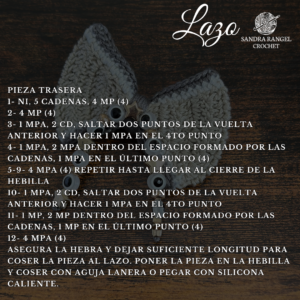
- ni, 5 cd, 4 mp (4).
- 4 mp (4).
- 1 mpa, 2 cd, saltar dos puntos de la vuelta anterior y hacer 1 mpa en el 4to punto.
- 1 mpa, 2 mpa dentro del espacio formado por las cadenas, 1 mpa en el último punto (4).
- 4 mpa (4) (repite esta vuelta hasta llegar al cierre de la hebilla aproximadamente hasta la vuelta 9).
- 1 mpa, 2 cd, saltar dos puntos de la vuelta anterior y hacer 1 mpa en el 4to punto.
- 1 mp, 2 mp dentro del espacio formado por las cadenas, 1 mp en el último punto (4).
- 4 mp (4).
Asegura la hebra y deja suficiente longitud para coser la pieza al lazo. Unir la pieza a la hebilla con aguja lanera o pegar con silicona caliente.
Espero que disfrutes tejiendo este lazo tanto como yo disfruté creándolo. Si decides hacerlo, ¡me encantaría ver tu resultado! No olvides compartirlo y etiquetarme en las redes sociales para que pueda ver tus hermosas creaciones. 🌟
🎀✨🧶💛
Discover the Magic of this Crochet Bow
-Watch the short on the left to see the light bow in action
-Explore the full playlist of Crochet Hair Ideas and discover more reels on hair accessories by clicking the button below.!

